How to Run macOS Sequoia on an Unsupported 2015 MacBook Pro
Apple stops shipping updates long before the hardware stops being useful. Here's how I took a 2015 MacBook Pro from Yosemite all the way to Sequoia — and the one staging step almost every guide skips.
A 2015 MacBook Pro that shipped with — and got stuck on — OS X Yosemite (10.10.5) is still a genuinely capable machine. The SSD is fast, the screen is sharp, the keyboard works. The only thing standing between it and a modern, still-patched macOS is Apple’s supported-hardware list.
OpenCore Legacy Patcher (OCLP), an open-source project from the Dortania team, removes that limit. It installs a bootloader that lets an “unsupported” Mac boot current versions of macOS, then patches in the drivers Apple left behind. This is the exact process I used to bring a 2015 MacBook Pro up to macOS Sequoia — including the non-obvious part that trips most people up.
This replaces the operating system. Back up anything you care about first — a Time Machine image, or just copy the files that matter to an external drive. Unsupported patching also means you own the machine afterward: it runs well, but it isn't Apple-blessed, so keep that backup.
What you’ll need
- The older Mac — mine was a 2015 MacBook Pro running OS X 10.10.5 Yosemite.
- A USB drive, 32 GB minimum, that you’re fine erasing.
- A working internet connection.
- A backup plan for downloads. On a very old macOS the built-in browser is often too outdated to load modern sites or download files, so you may need a second device — more on that below.
The process
-
Check your model is supported. On the OpenCore Legacy Patcher supported-models list, find your Mac and note the newest macOS it can run. That’s your target — for this 2015 machine, it’s Sequoia.
-
Download OpenCore Legacy Patcher. Grab the latest release from the project’s GitHub releases page and download
OpenCore-Patcher.pkg. If the old Mac’s browser refuses to load the page or download the file, go straight to the direct release URL instead. This is the version I used — swap the version number for whatever’s current:https://github.com/dortania/OpenCore-Legacy-Patcher/releases/download/2.4.1/OpenCore-Patcher.pkg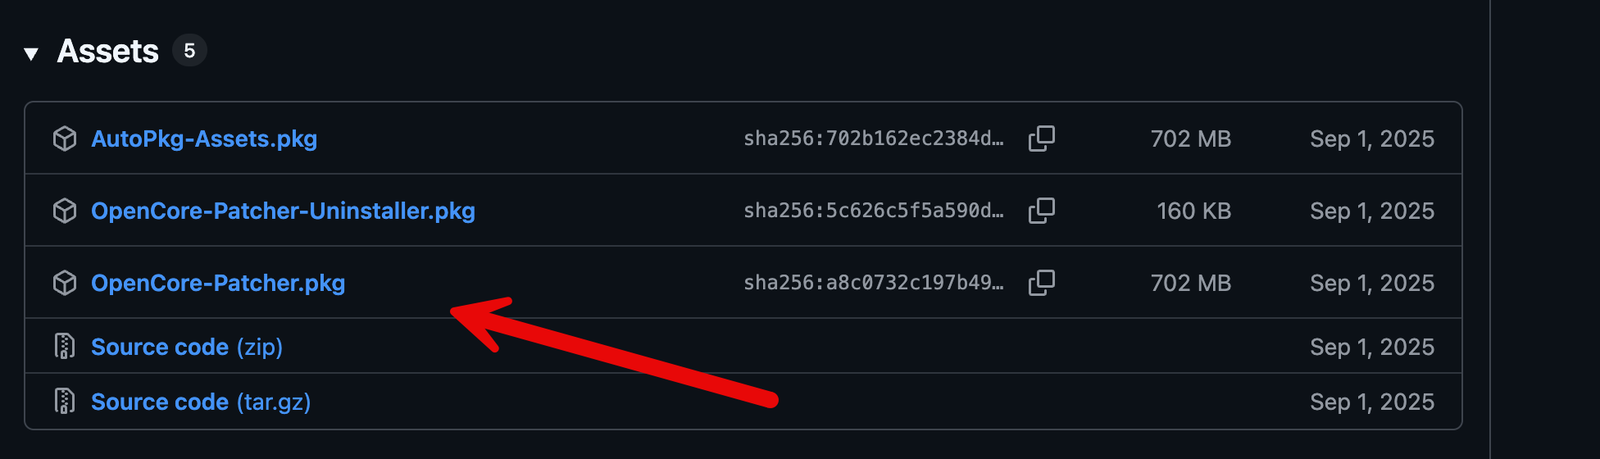
Grab OpenCore-Patcher.pkgfrom the releases page — or the direct URL if the old browser won't cooperate. -
Install and launch it. Run
OpenCore-Patcher.pkgto install, then open OpenCore-Patcher. -
Create the macOS installer. Click Create macOS Installer, then Download macOS Installer. Choose your target macOS (read “The part everyone misses” below before you pick), and let it download. When prompted, point it at your 32 GB+ USB drive.
-
Build the installer and write it to disk. The tool validates the image, then asks to build the installer — say Yes. When it offers to install to disk, say Yes and choose your main drive as the destination.
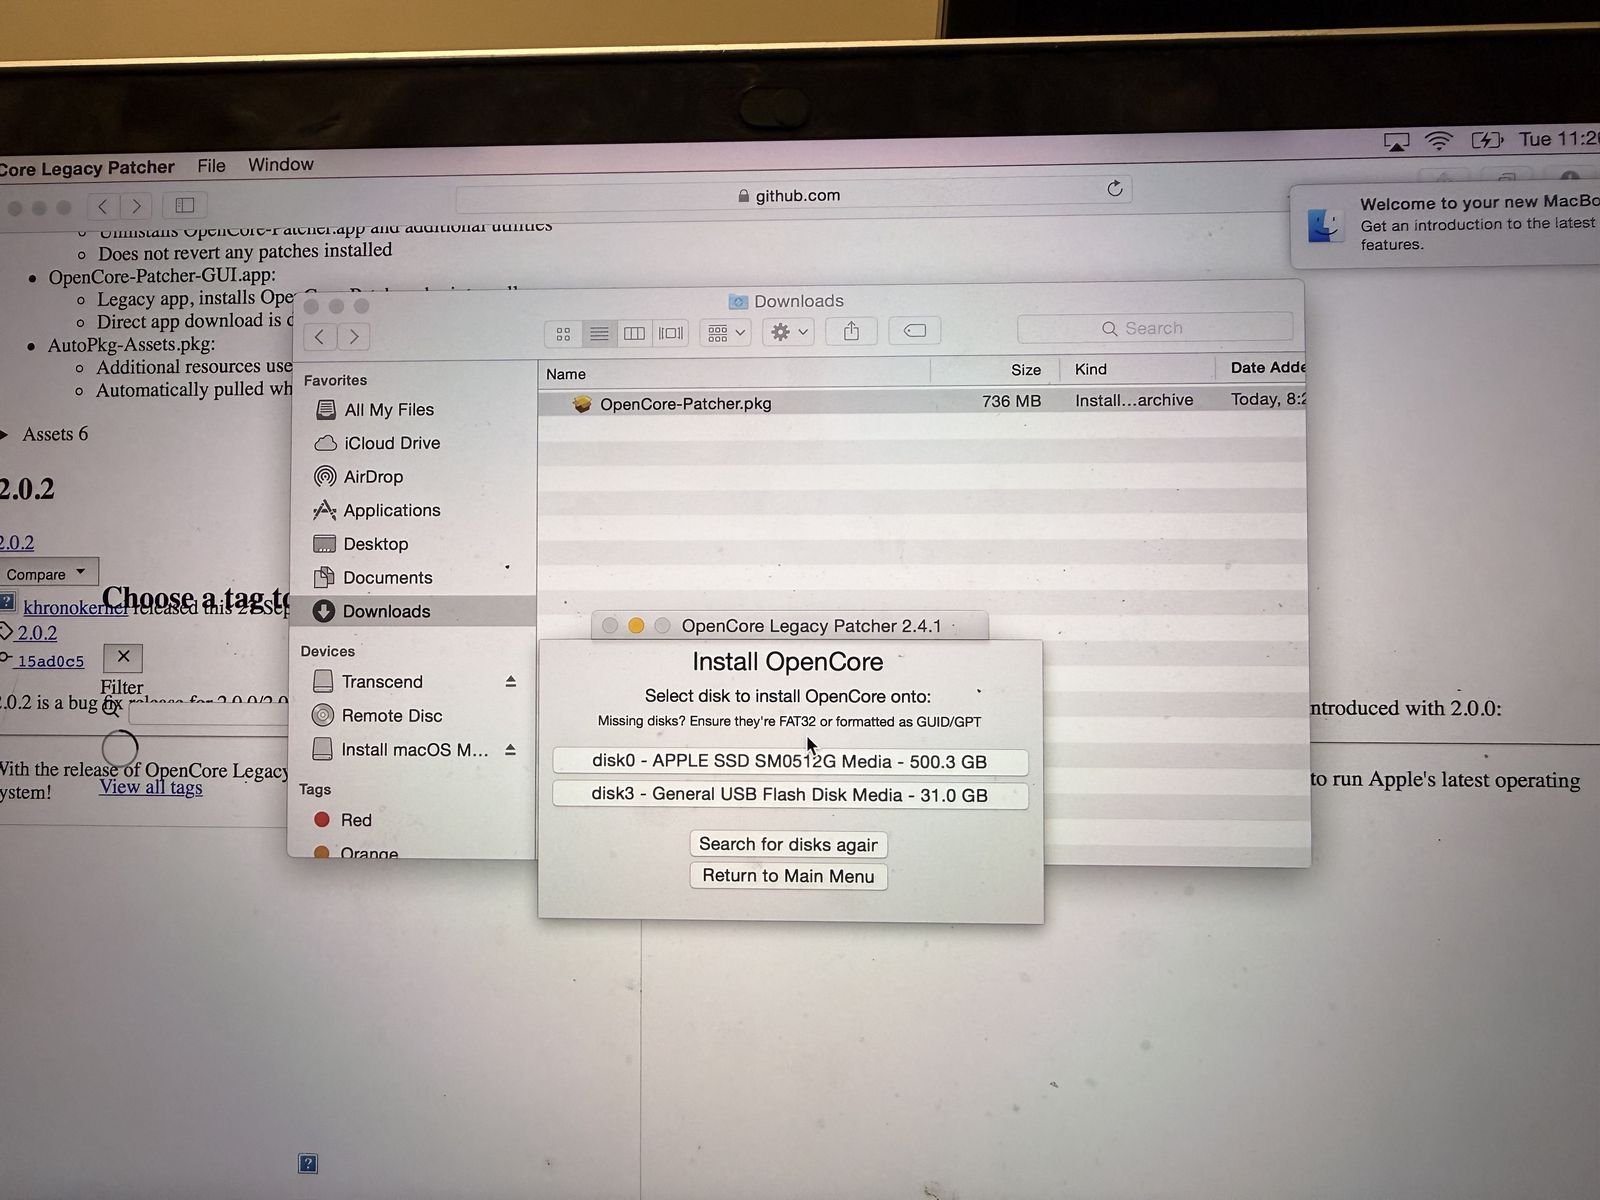
Choosing the internal drive (500 GB here) as the destination. -
Reboot and pick the installer. It’ll prompt you to restart. As the screen tells you, hold the Option key while it boots so the startup picker appears, then choose the macOS installer.
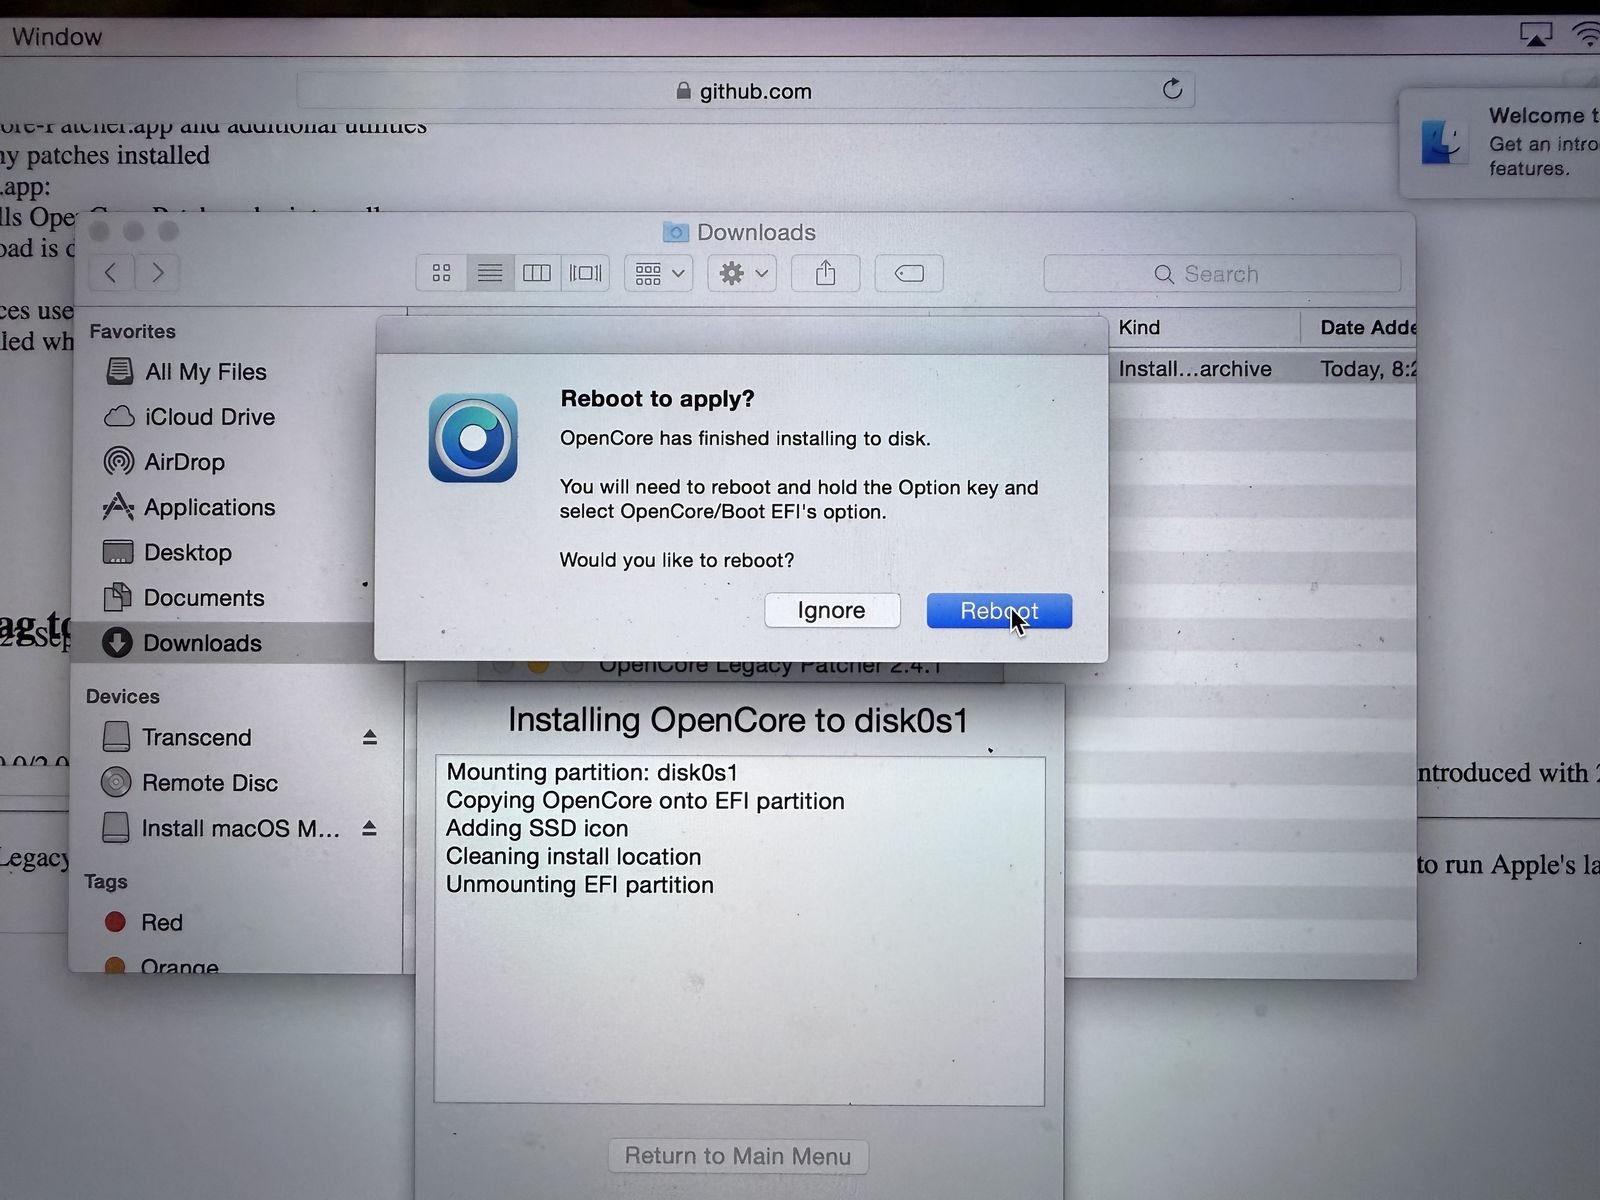
When it's ready, it prompts for a reboot. 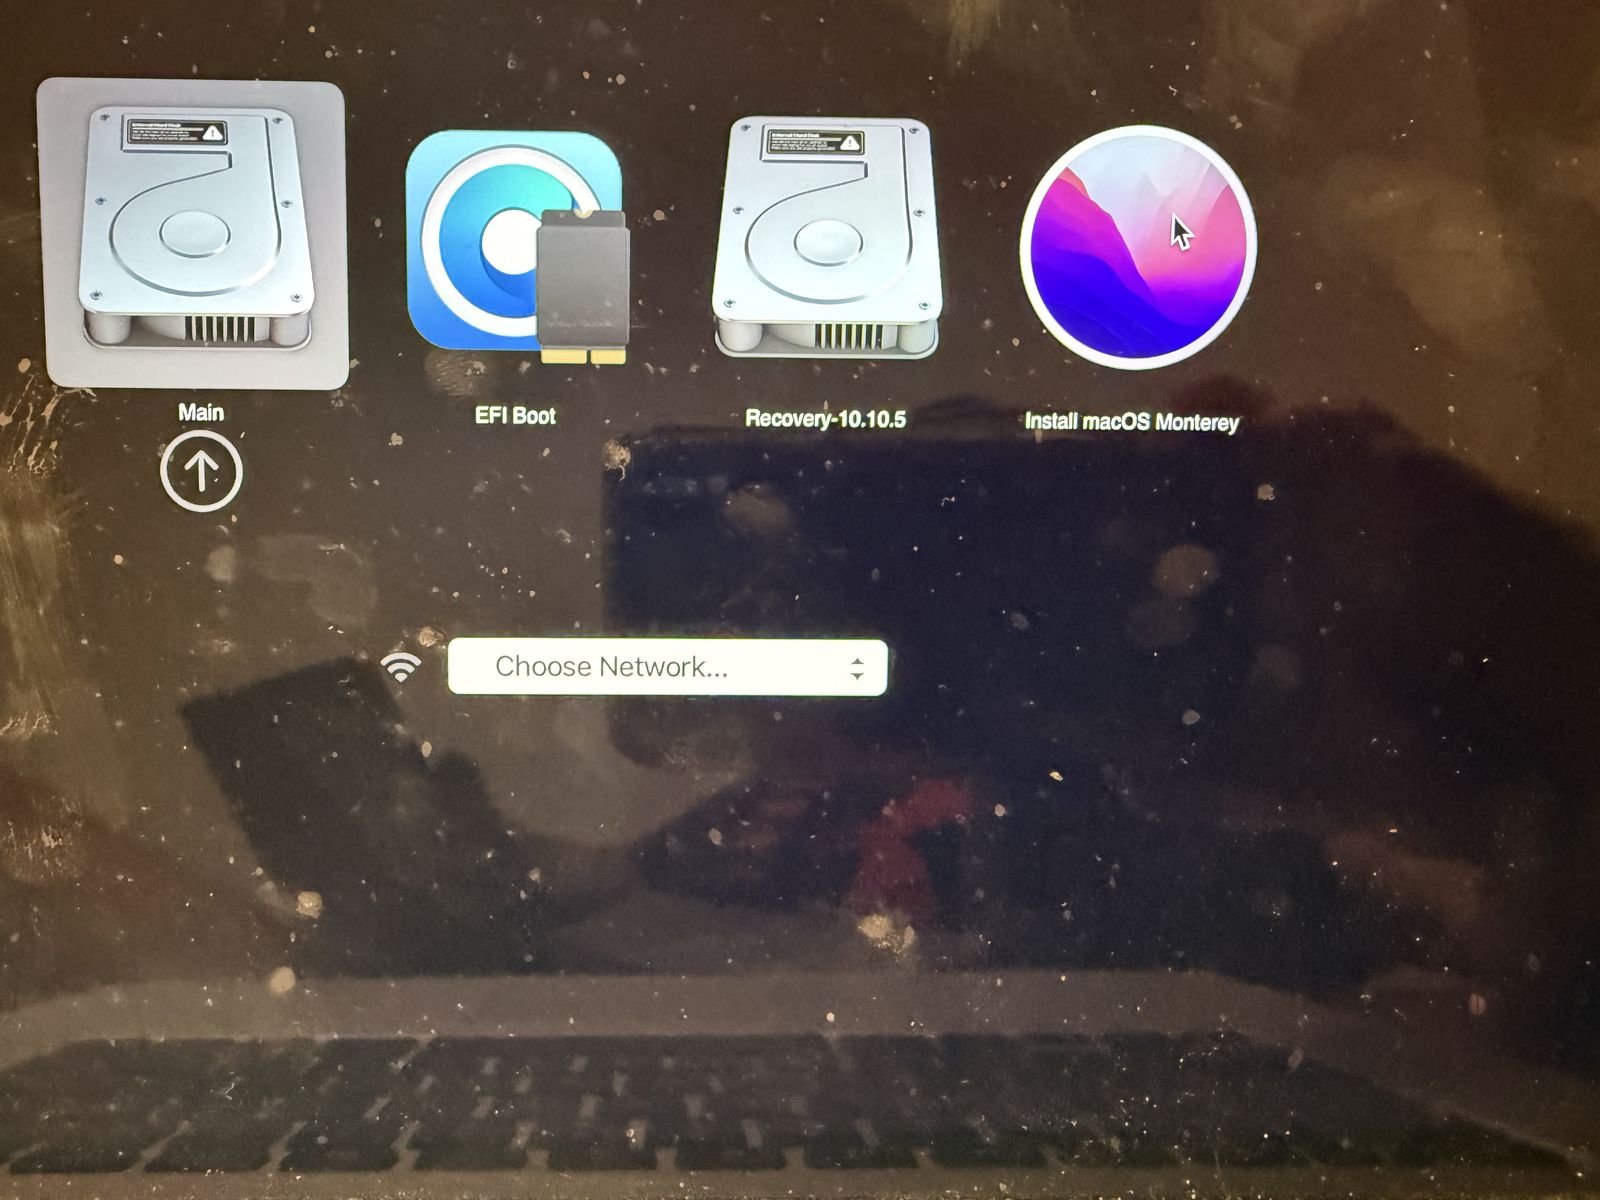
Holding Option brings up the boot picker — select the installer to begin. 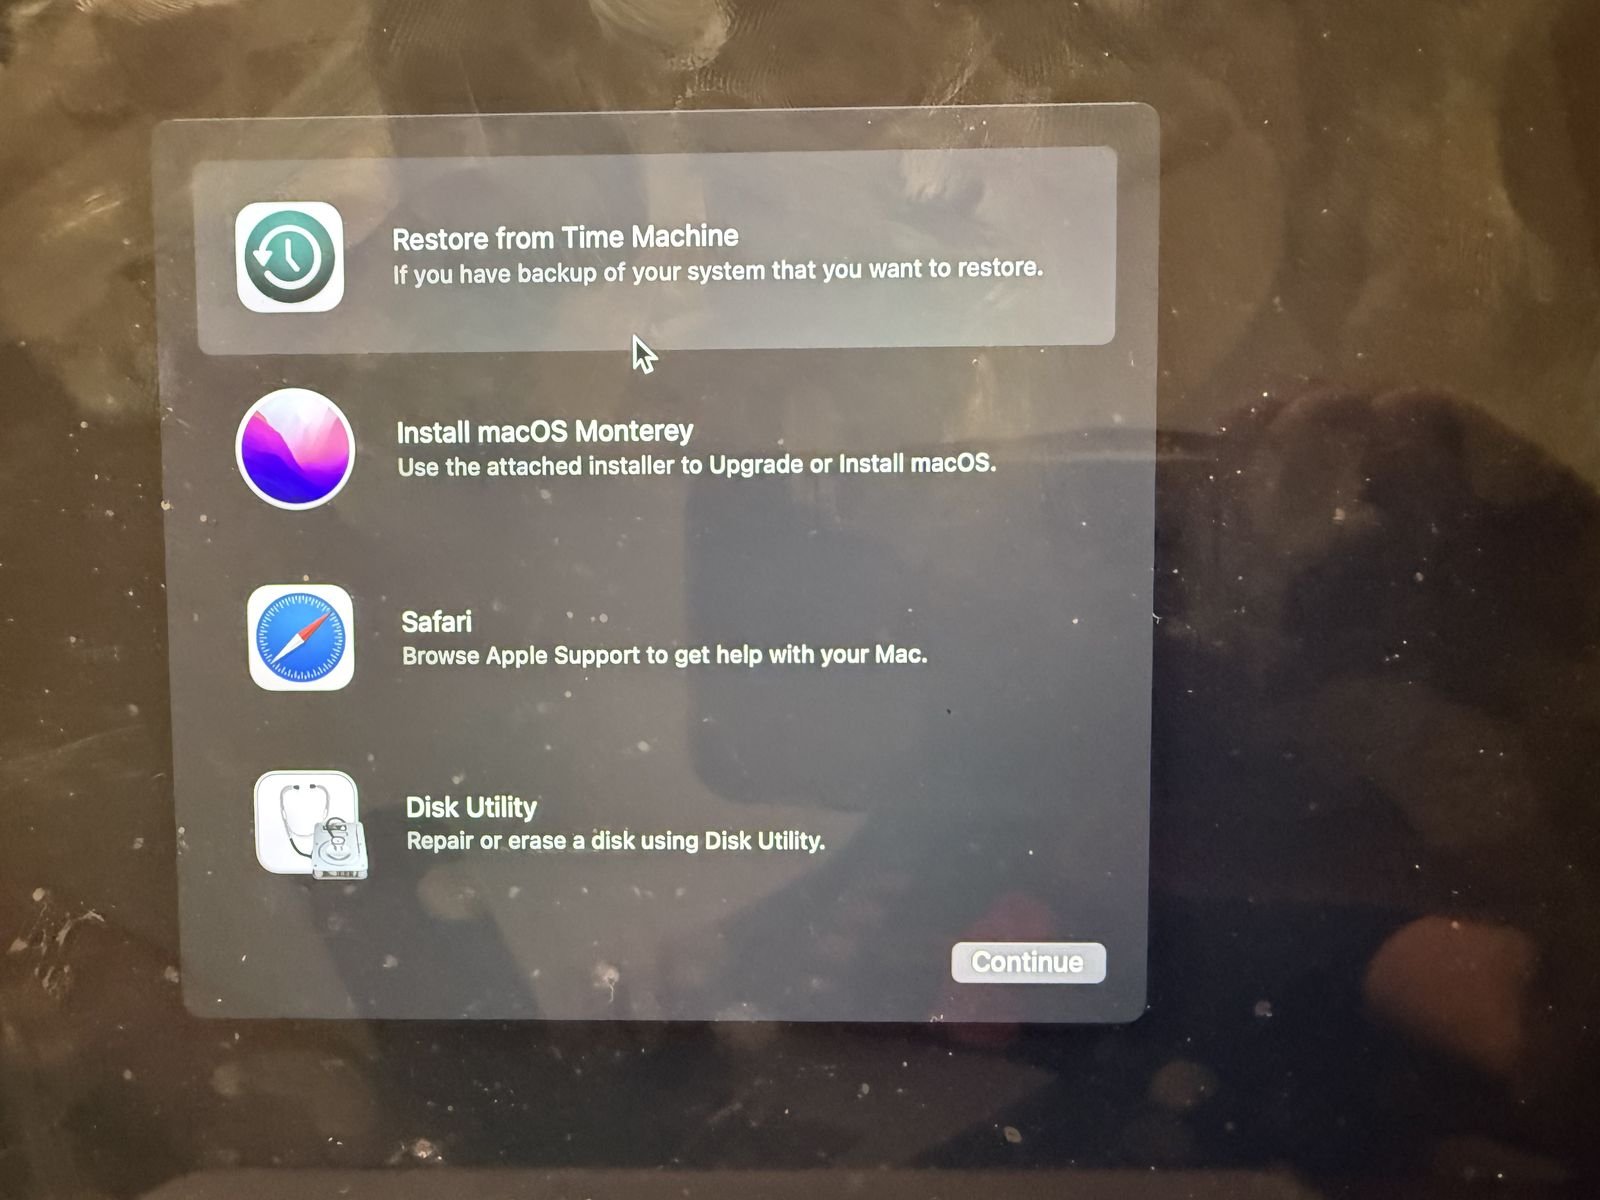
The installer launches and begins setting up macOS. -
Re-apply root patches after install. Once the new OS is up, run OpenCore-Patcher again on the machine and let it apply any post-install root patches it recommends for your model (graphics, Wi-Fi, and so on).
The part everyone misses
My 2015 MacBook Pro is supported all the way up to Sequoia — but coming from Yosemite, OCLP would not let me install Sequoia directly. I had to climb one rung at a time: install Monterey first, boot into it successfully, then run OpenCore Legacy Patcher again from Monterey to move up to Sequoia.
So if Sequoia isn't offered, or the installer refuses on the first pass, don't assume your Mac is unsupported. Step up one major version, get it booting, and re-run the patcher.
The payoff
That’s it. The same 2015 MacBook Pro that was frozen on a 2015 operating system now runs current macOS — modern browser, current security patches, real usable life left in it. OpenCore Legacy Patcher does the heavy lifting; the only genuine trick is knowing to climb the versions one step at a time instead of reaching for the top and giving up when it says no.
Appendix — starting completely fresh
Separate from the upgrade above: if you’d rather wipe the MacBook back to a clean slate first — or you need to rescue a machine that won’t boot — here’s the full erase-and-reinstall from Apple’s Internet Recovery. It reinstalls whatever macOS the machine originally shipped with (Yosemite, in my case); you can then run OpenCore on top.
-
Boot into Internet Recovery. Restart and hold Option + Command + R (or Command + R for the local recovery partition). Join Wi-Fi and let the recovery environment load.
-
Open Disk Utility from the macOS Utilities menu.
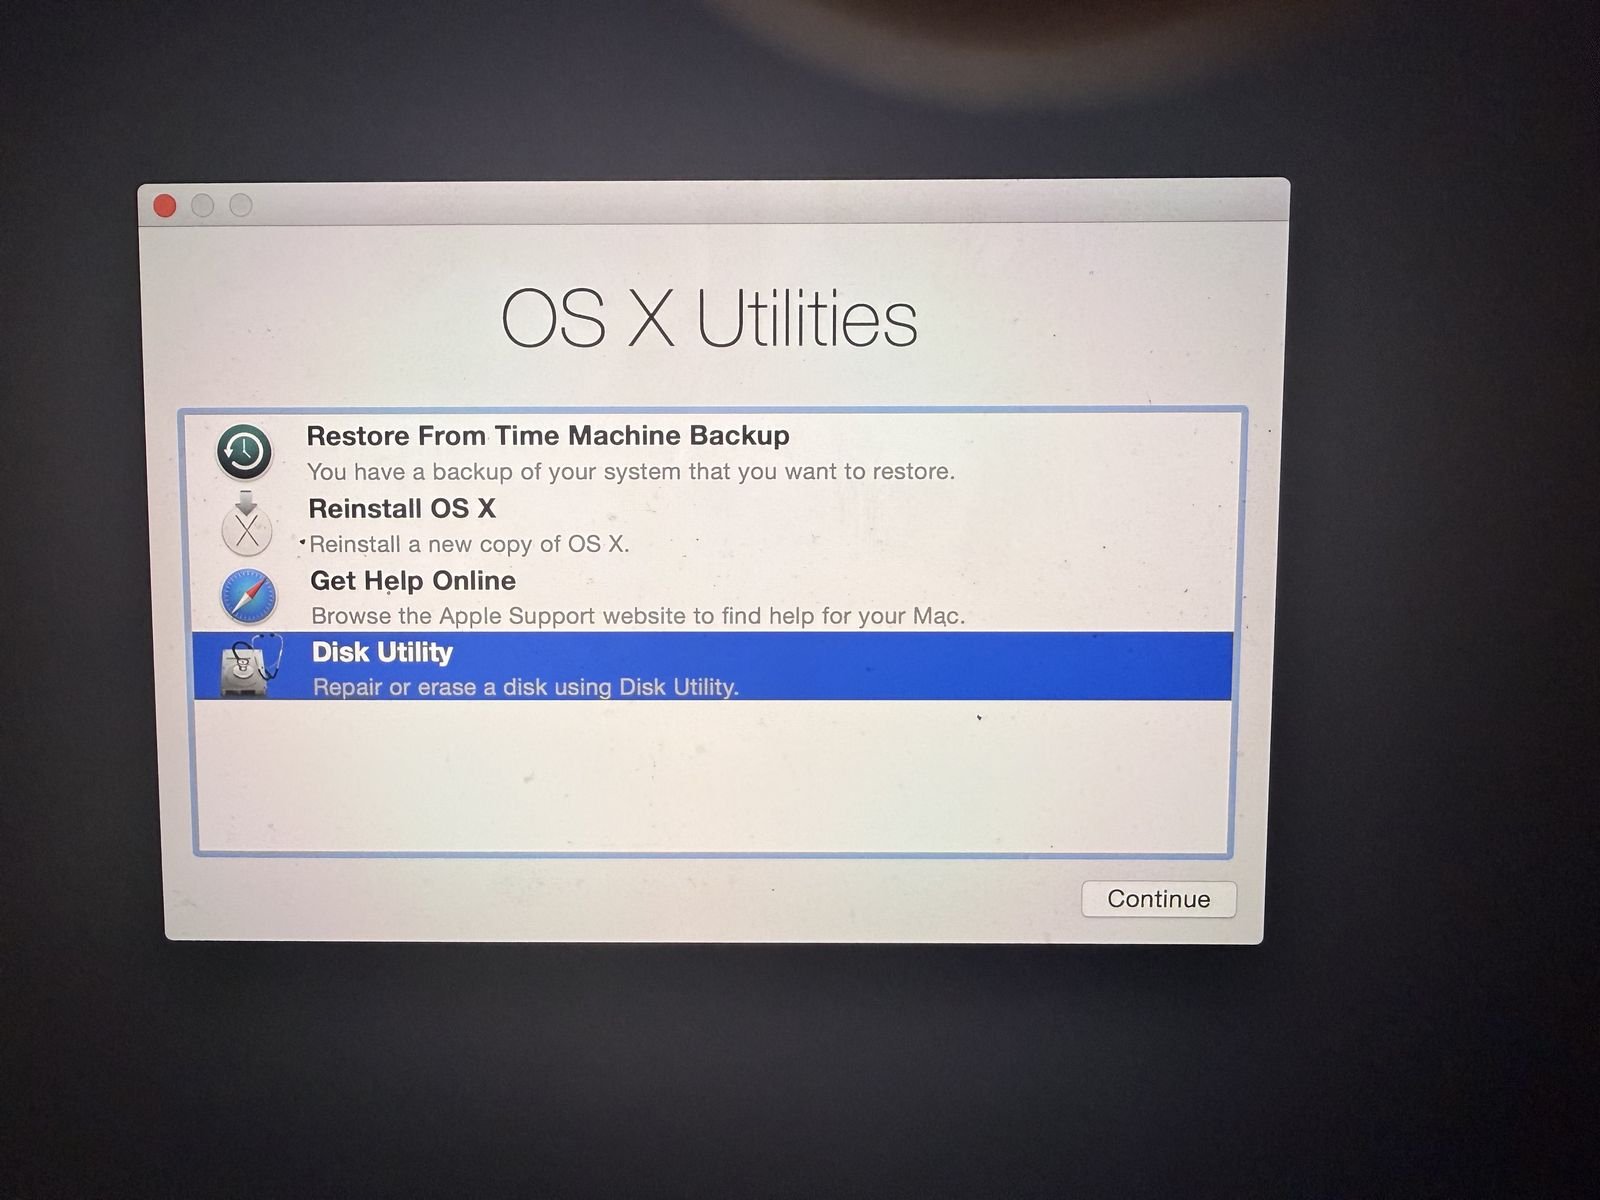
From macOS Utilities, open Disk Utility. -
Erase the main drive. Select it, click Erase, and confirm.
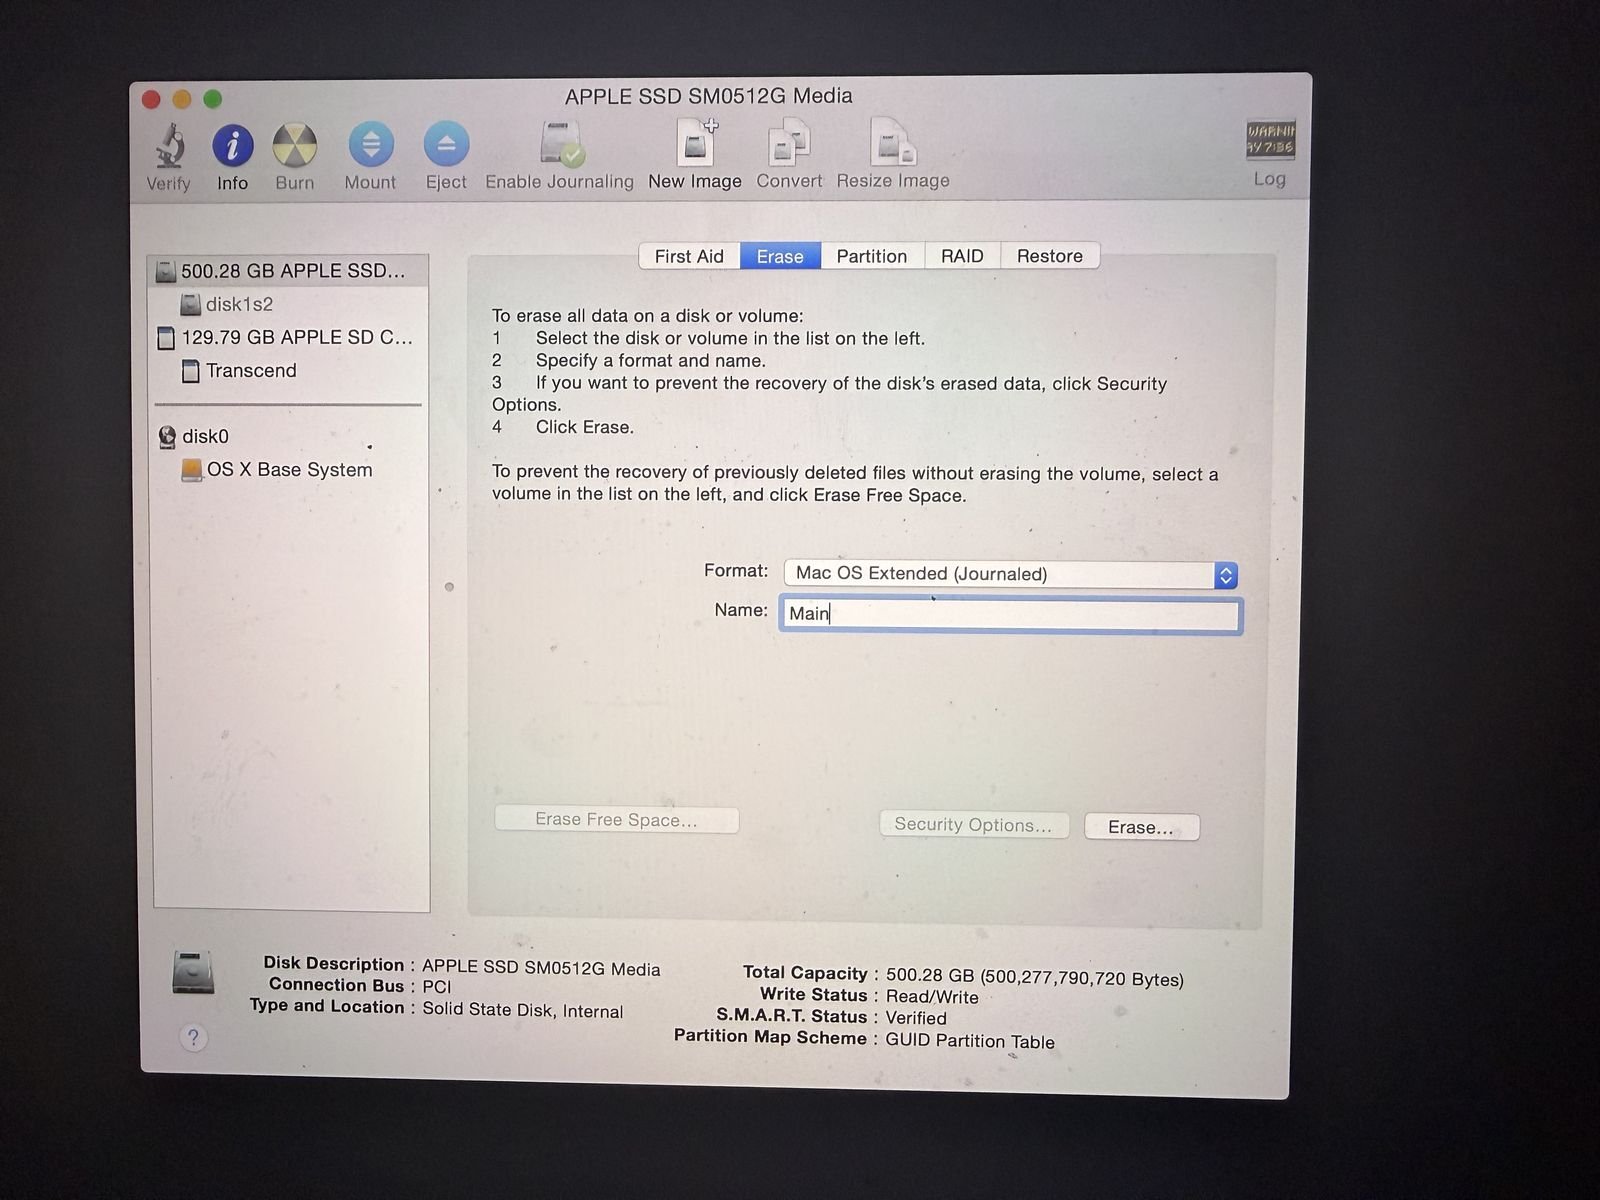
Erase the internal drive to start clean. -
Reinstall macOS. Back at the macOS Utilities menu, choose Reinstall macOS.
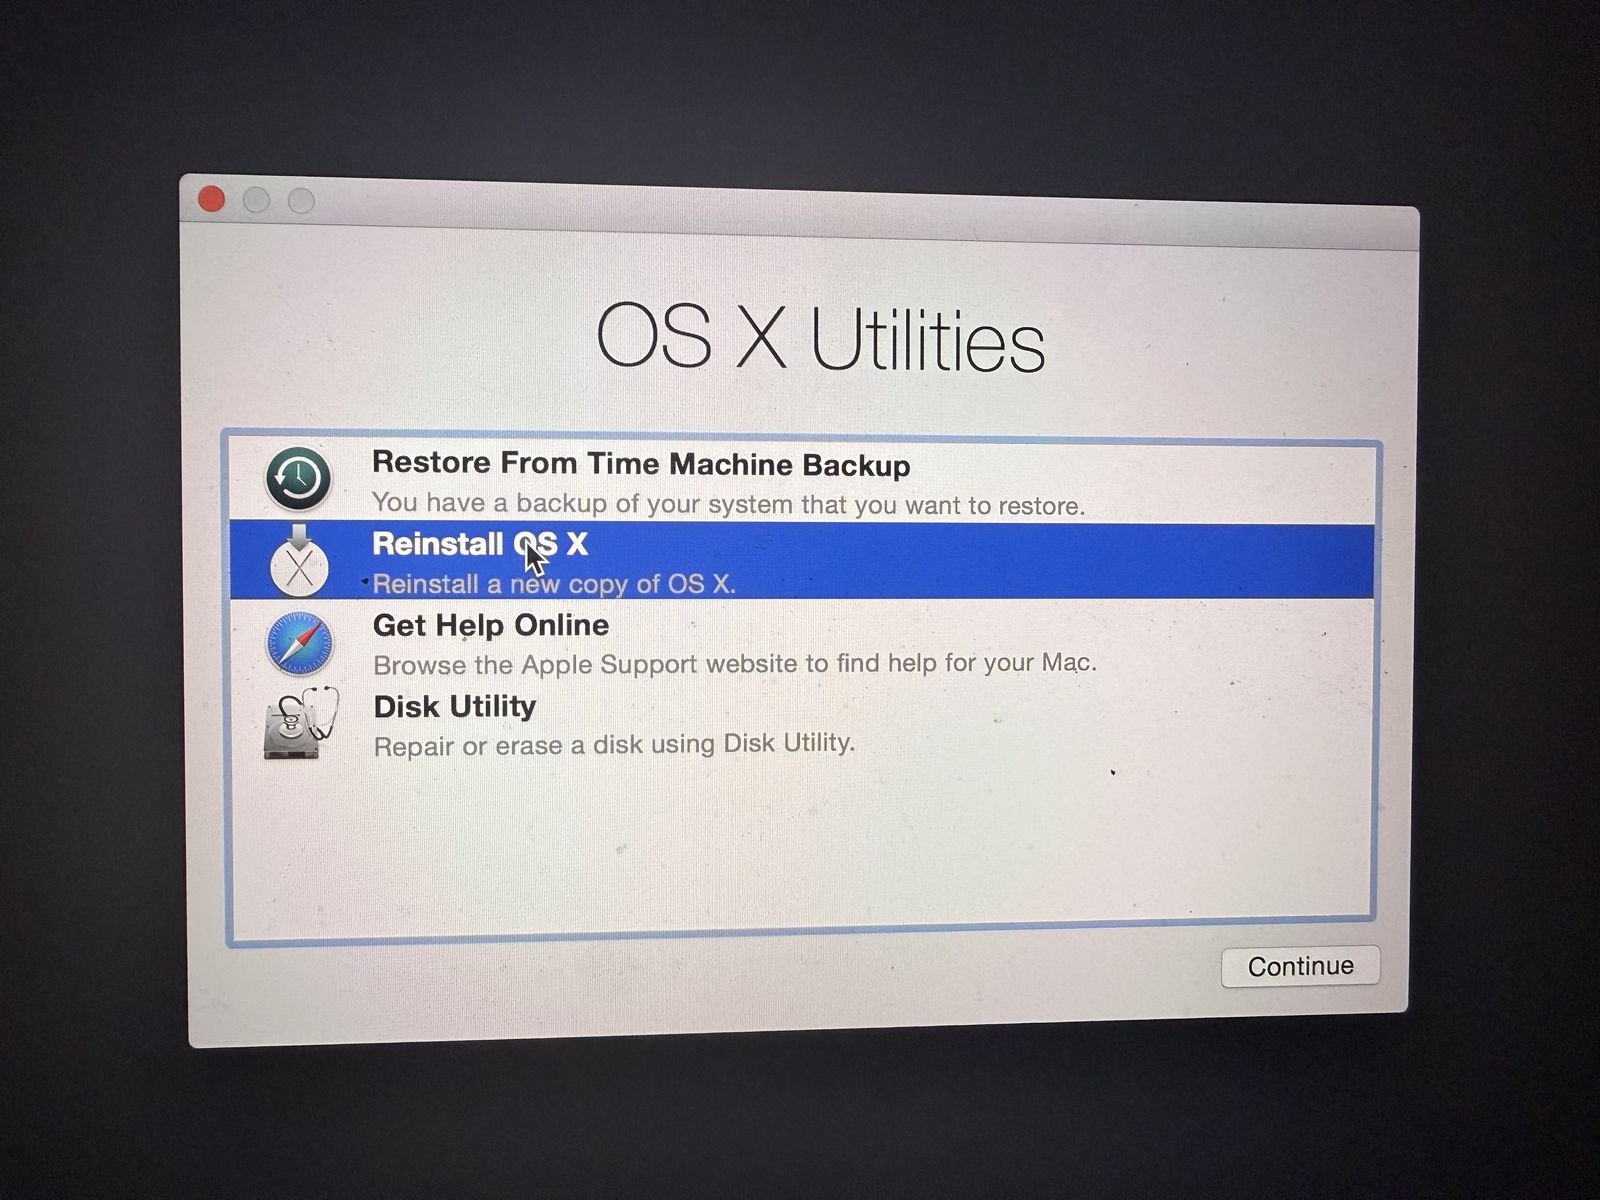
Back in macOS Utilities, choose Reinstall macOS. -
Start the install. Work through the prompts to begin — OS X Yosemite, in my case.
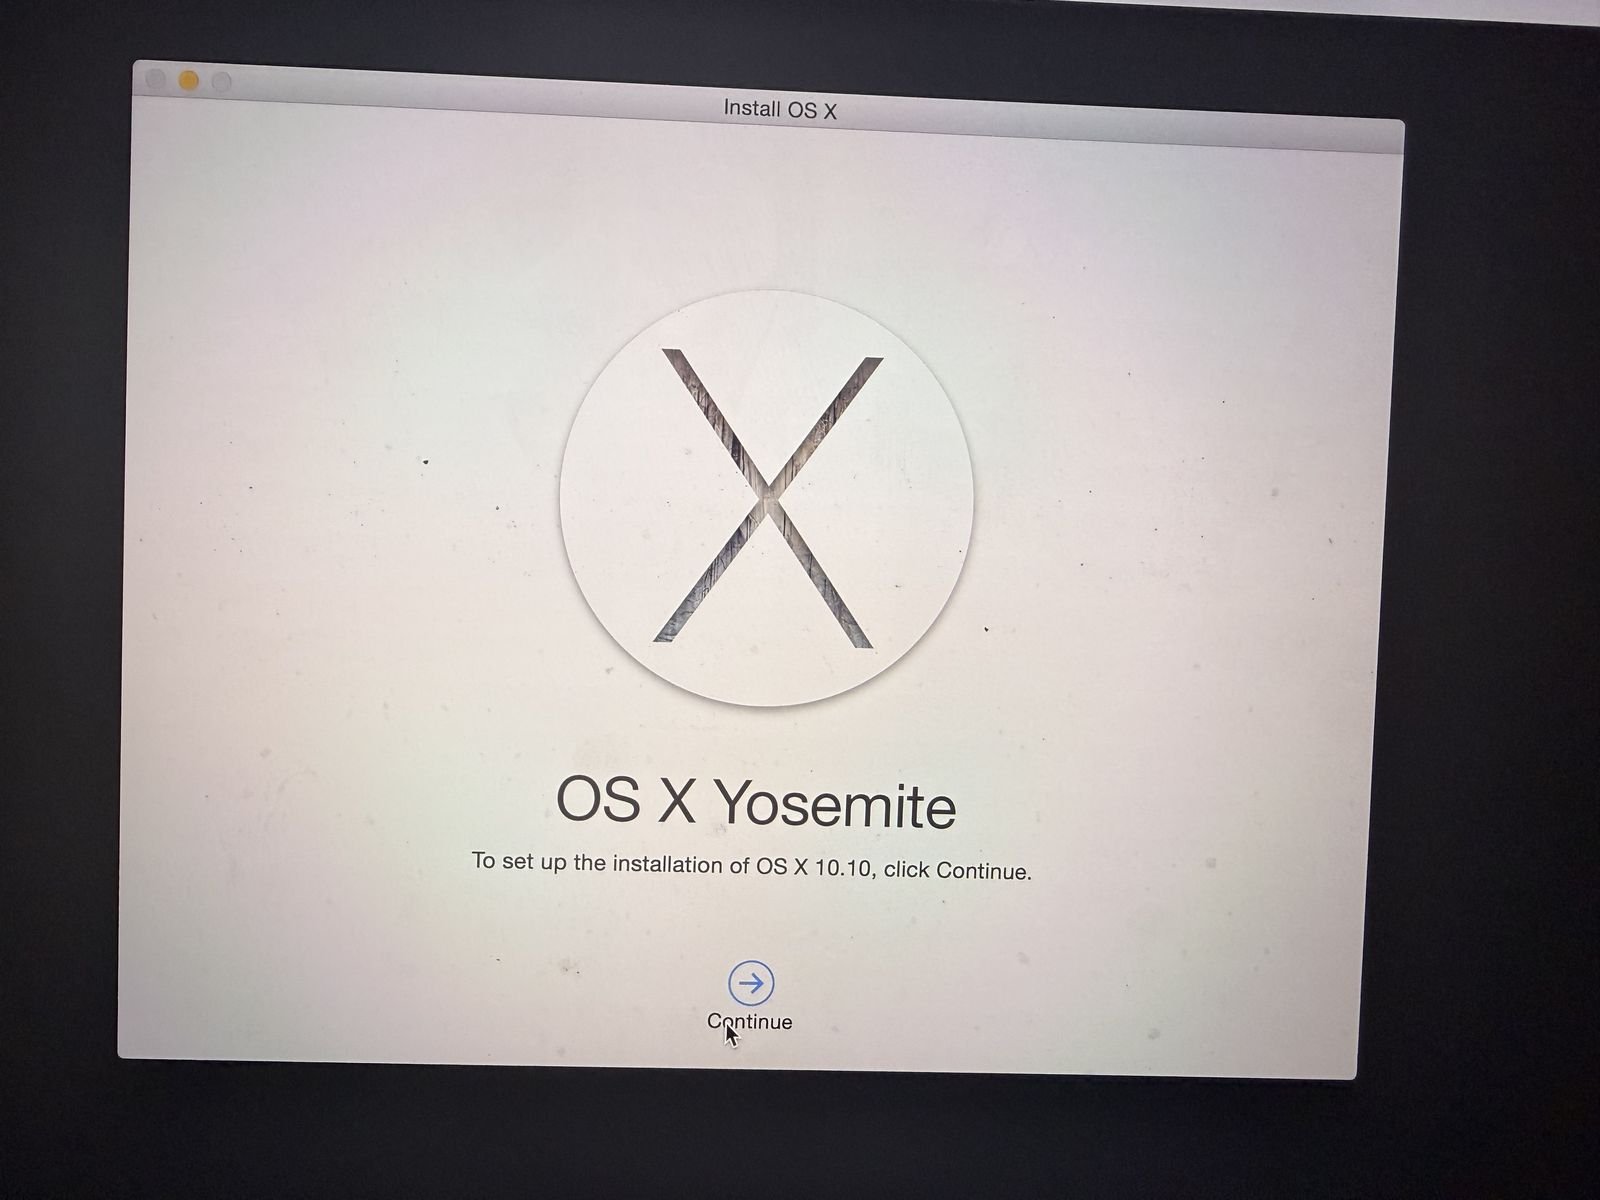
The original OS X Yosemite install getting underway. -
Choose the formatted drive as the destination when asked.
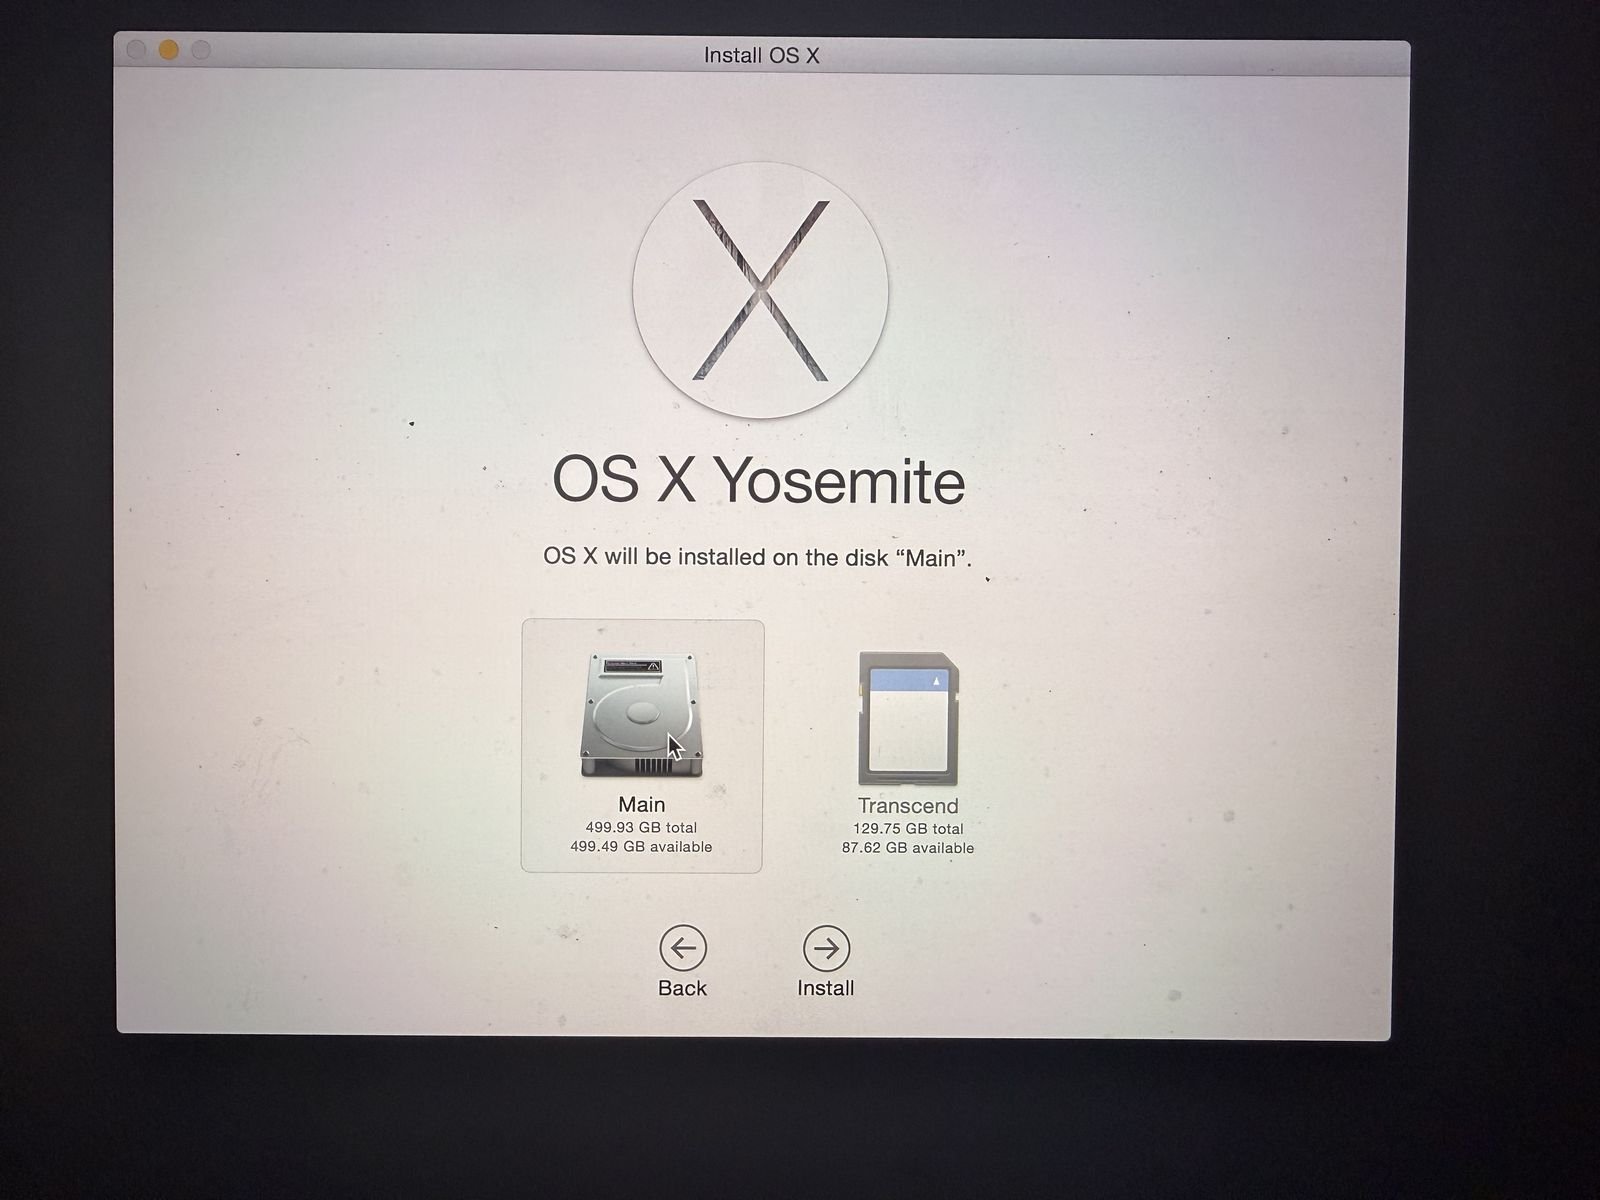
Point the installer at the drive you just erased.